Ever made a patch of LOD terrain? Started to pull the vertexes
to get it into the shape you wanted? Did you scrap it? Did it look
like crap? Did it take you way longer than you expected? Did you
rip your hair out in frustration?
Thought so... but it does not have to be that way.
LOD terrain is a great tool for doing terrain. But when
you pull a vertex, the ones around follows it unless you lock them
in place. Sometimes this is a good thing, sometimes not so good.
And making large LOD patches will make you AND your computer crawl
on your knees.
There IS a better way. And because I'm a nice guy, I will tell
you how it works.
Set the grid to an absolute minimum of 8 before starting this tutorial,
I'd say use 16. Do this now. NOW! Believe me, you will thank me
later... ( actually this is true for all mapping except a few cases,
and if you need to read tutorials: those few cases are not for you
) I repeat: GRID, NOW.
1. Draw a brush over the area where you want the
terrain.
The height does not matter, only the width and length. Make sure
it is selected before moving on to the next stage.
2. Select "LOD terrain" -> "Create
from brush".
You now have a patch of LOD terrain roughly the same size as your
original brush. This is because LOD can only exist in sizes made
up by 512*512 units. This means its smallest size is 512*512 units
and then any sizes that can be constructed by squares of 512*512
units ( like 512*1024 and 2048*3584 ).
3. Select the LOD.
As it is now without height and has no bottom, you must select it
from above.
4. Select "LOD terrain" -> "Save
To Image".
Save it as something that you will remember, like .tga.
5. Load the *.tga file into a good drawing application.
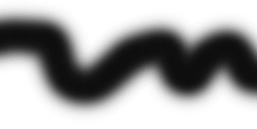
Preferably one that supports "fussy" brushes ( Like PhotoShop
or PaintShop ). With "fussy" brushes, I mean the ability
to draw like this ( with smooth edges ):
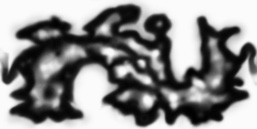
This image would become a deep canyon ( dark ) with rather steep
slopes up to the high plateau ( light ).
6 Redraw it.
Remember when drawing that white is high, black is low.
The angle of the slopes you create are dependent of how smoothly
the color fades from light to dark. If one pixel is white and the
one next to it is black, it will be a wall, not a slope. Having
really steep slopes seldom looks good for two main reasons:
1) It does not look natural, simply because nature does not look
that way.
2) It has a tendency to result in errors in the completed map, because
soldiers can often manage to stick there heads into the ground and
see under the map to places they should not be able to see at these
places when using the lowest terrain settings ( most people use
the lowest settings when they play ).
This is an example of an early image I used when making the terrain
for Vemork
approach:
When you are done save it again ( still in *.tga format ).
7. Go back to Radiant and select the LOD again.
8. Select "LOD terrain" -> "Load
From Image".
And select the *.tga file you just edited.
9. Load the *.tga with "merge method":
"Replace existing terrain".
Wohaa! Cool eh? An not really a lot of work either.
One thing if this is the second or third time you load the
*.tga file after making small changes to it: If you look carefully
you will notice that each time you "Load from image" and
"Replace existing terrain", all of the LOD jumps up a
bit from where it was before ( say 32 units or something ). This
is not a problem if you only have the LOD in your map so far, but
as soon as you start to add spawns and houses and other stuff: you
kind of would like it to stay put even if you removed a hill or
made a new river in PhotoShop... So just be warned and be prepared
to note were it were before so you can move it back afterwards.
10. If you are satisfied at this point, your
done...
If not: go back to stage 5 and repeat the process
until you ARE satisfied.